Overview
Using Amazon Web Services, we can easily set up a static site worldwide without the need to maintain servers and load balancers.
In this guide, I’ll go over how I set up this site on AWS. I used the following AWS services:
I recently migrated my domain from nelsonfigueroa.dev to nelson.cloud, so I’ll be using this new domain as an example.
This guide assumes the following:
- You have already purchased a domain from a registrar like Namecheap, Gandi, or Porkbun.
- You have already signed up for an Amazon Web Services account.
Creating an S3 Bucket
First, we’ll need to create an S3 bucket. This is where static files (HTML/CSS/JavaScript/Images, etc) will go.
In the AWS console, browse to S3. Create a new bucket. I named my bucket with the same name as my domain.
Then click on the bucket and go to the “properties” tab. Scroll all the way to the bottom to the “Static website hosting” section. Click the “Edit” button. Now configure this bucket to host a static site:
- Under “Static website hosting” select “Enable”
- Under “Hosting type” select “Host a static website”
- In the “Index document” field, write in “index.html” (unless you want a different root page for your site)
- Then click “Save changes”

Then go to the “Permissions” tab in the bucket. Click the “Edit” button under the “Block public access (bucket settings)” section. Uncheck the “Block all public access” checkbox. We need this bucket to have public access so the site is viewable across the internet. Save changes.

Next, still under the “Permissions tab”, click the “Edit” button on the “Bucket policy” section. We need to add permissions for public access. Here is what the policy should look like. Change the bucket name after Resource to your bucket name:
{
    "Version": "2012-10-17",
    "Statement": [
        {
            "Sid": "PublicReadGetObject",
            "Effect": "Allow",
            "Principal": "*",
            "Action": "s3:GetObject",
            "Resource": "arn:aws:s3:::nelson.cloud/*"
        }
    ]
}
Then save changes.
At this point “Block all public access” should be off, and the bucket policy should show under the section:

To verify that everything works, we can upload some HTML files to test out the site.
Go to the “Objects” tab on the bucket and drop in your static files. Even a single index.html file will do. In my case I have a lot more files since my site has blog posts and other things:

Then go to the “Properties” tab and at the very bottom you should see a “Bucket website endpoint”. Click on this link and your site should open in your browser. If you see the contents of your HTML file(s) then you are all done here with S3.
The AWS docs provide more information about S3 permissions for static hosting if you’re curious:
Creating an ACM SSL Certificate
Next we need to request an SSL certificate in ACM that we’ll use with CloudFront. This will allow us to set up our site with HTTPS.
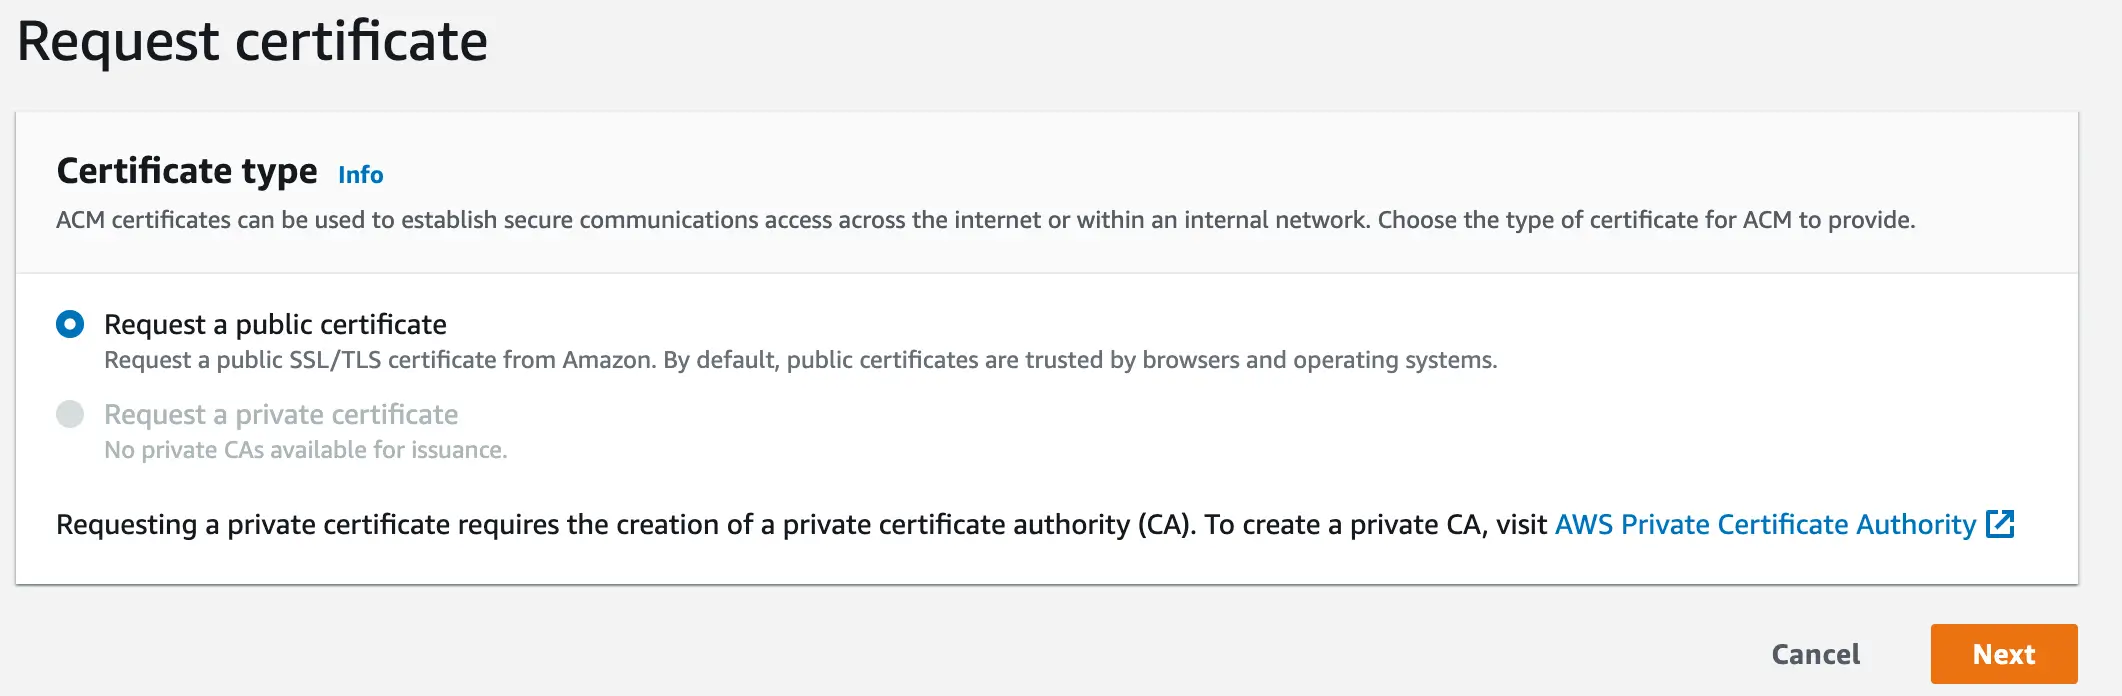
In AWS, go to “AWS Certificate Manager (ACM)”.
Then click the “Request” button.
For “Certificate type” select “Request a public certificate”. Then click Next.
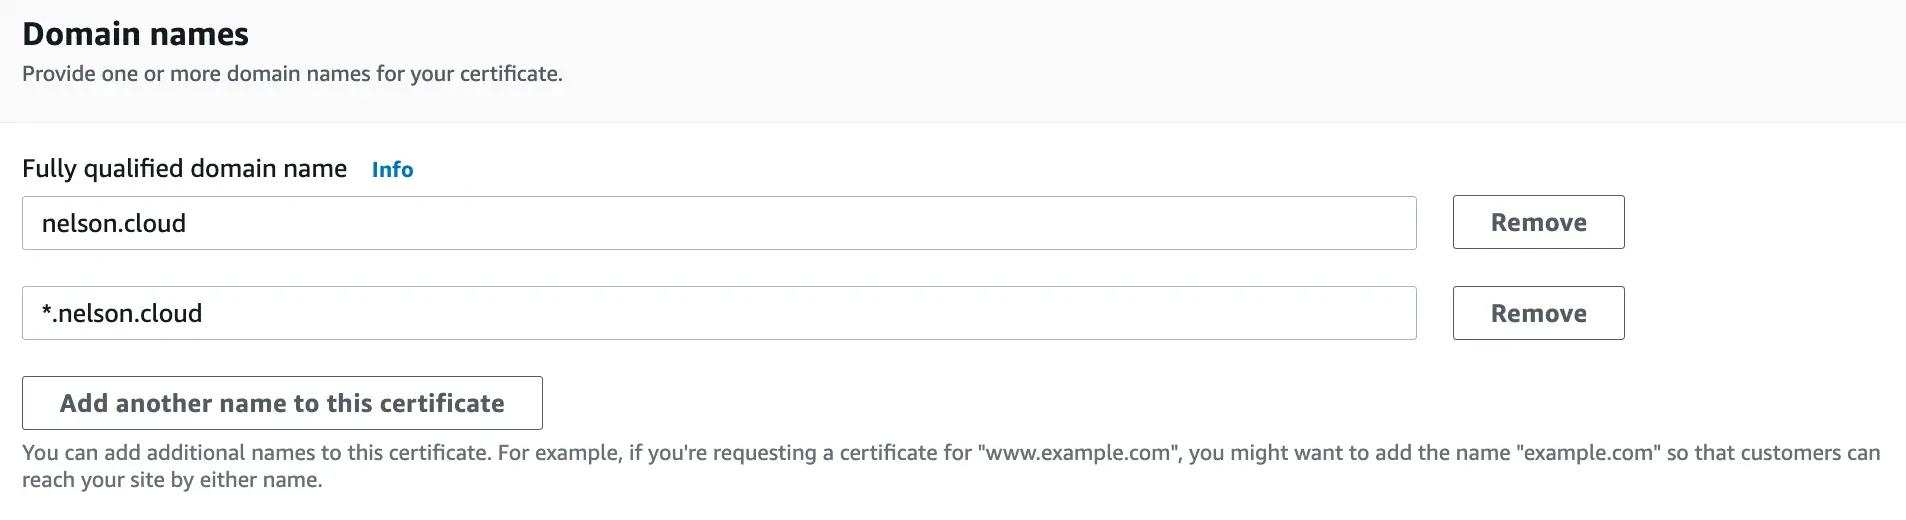
Then, under “Fully qualified domain name” write in the name of your domain.
I also like to add in support for all subdomains. If you want to do this, add in the wildcard subdomain *.yourdomain.com
Under “Validation method” select DNS validation. Under “Key algorithm” select “RSA 2048” or higher if you’d like.
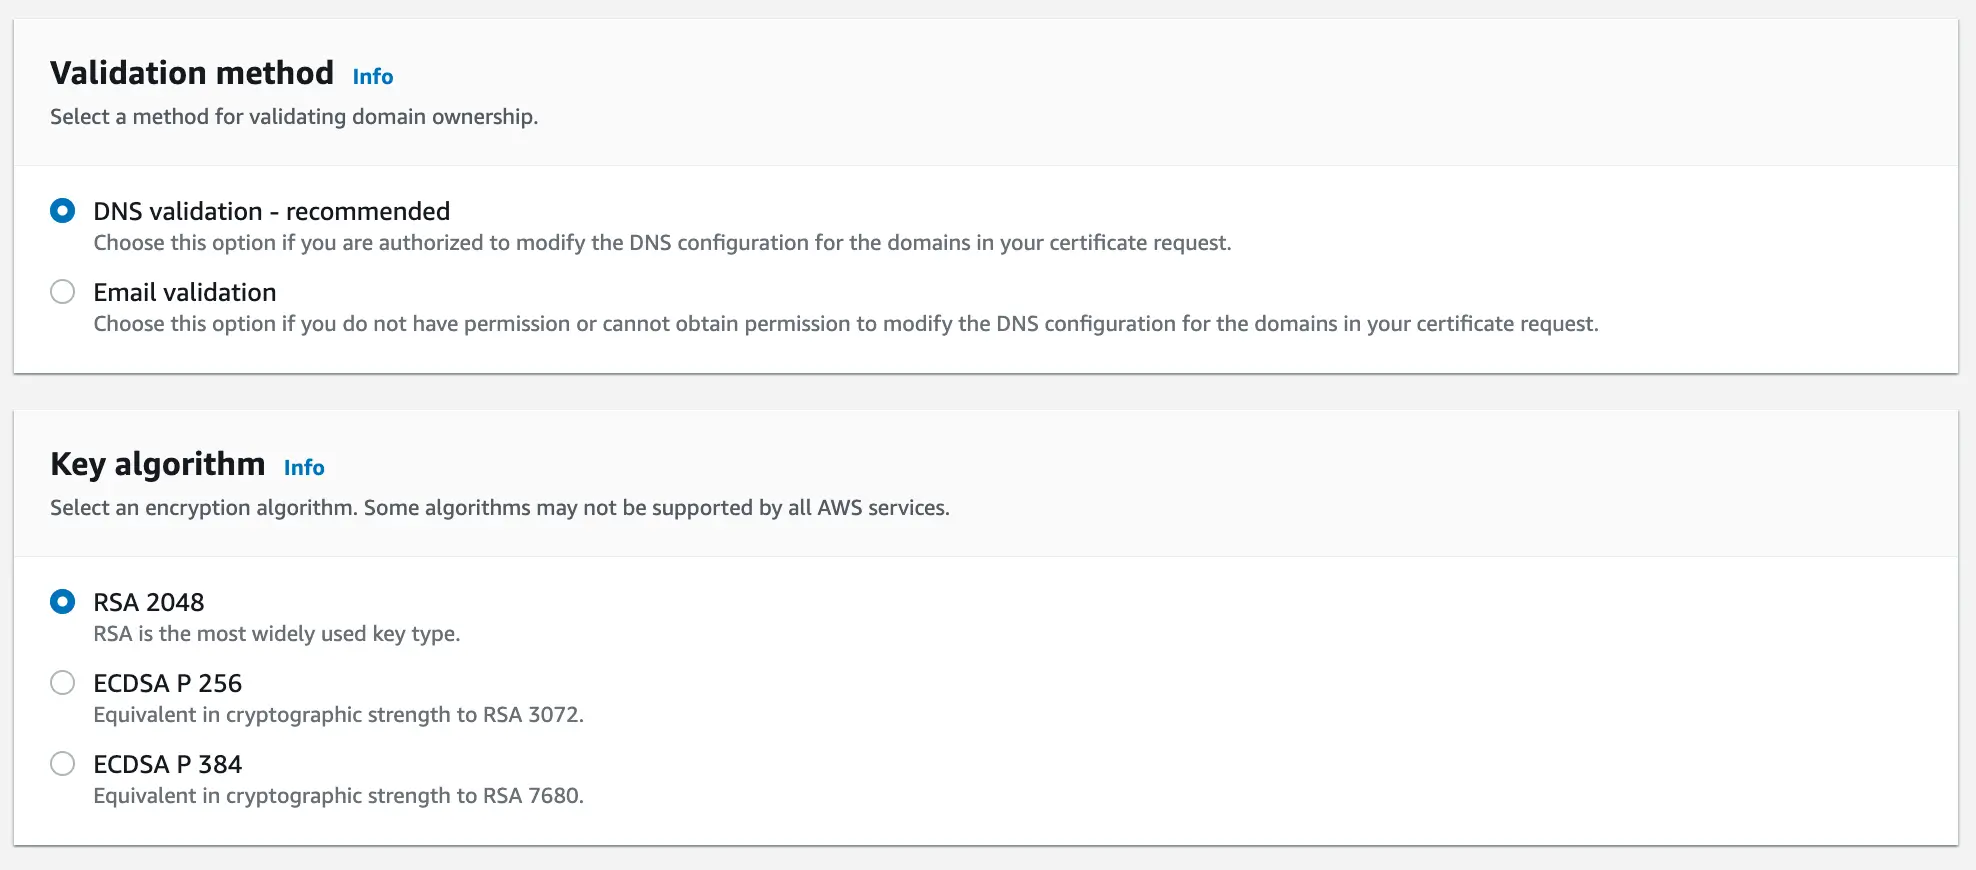
Then click the “Request” button.
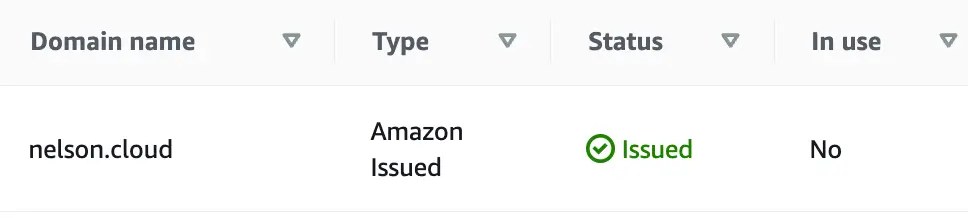
You’ll see that the new certificate says “Pending validation” under the “Status” column. Click into your certificate.
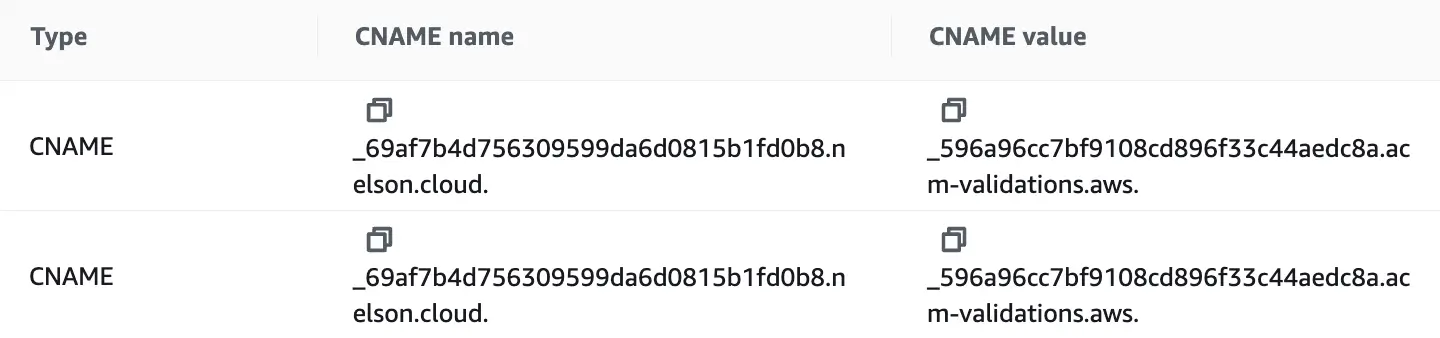
Under “Domains” you should see the columns “CNAME name” and “CNAME value”. You’ll have to create a CNAME record in Route 53 to validate this certificate.
Note that in my case the CNAME names and values are repeated. I only had to create the record once to validate both domains.
Go to Route 53 and create a public hosted zone for your domain (note that at the time of this writing hosted zones are 50 cents per month).
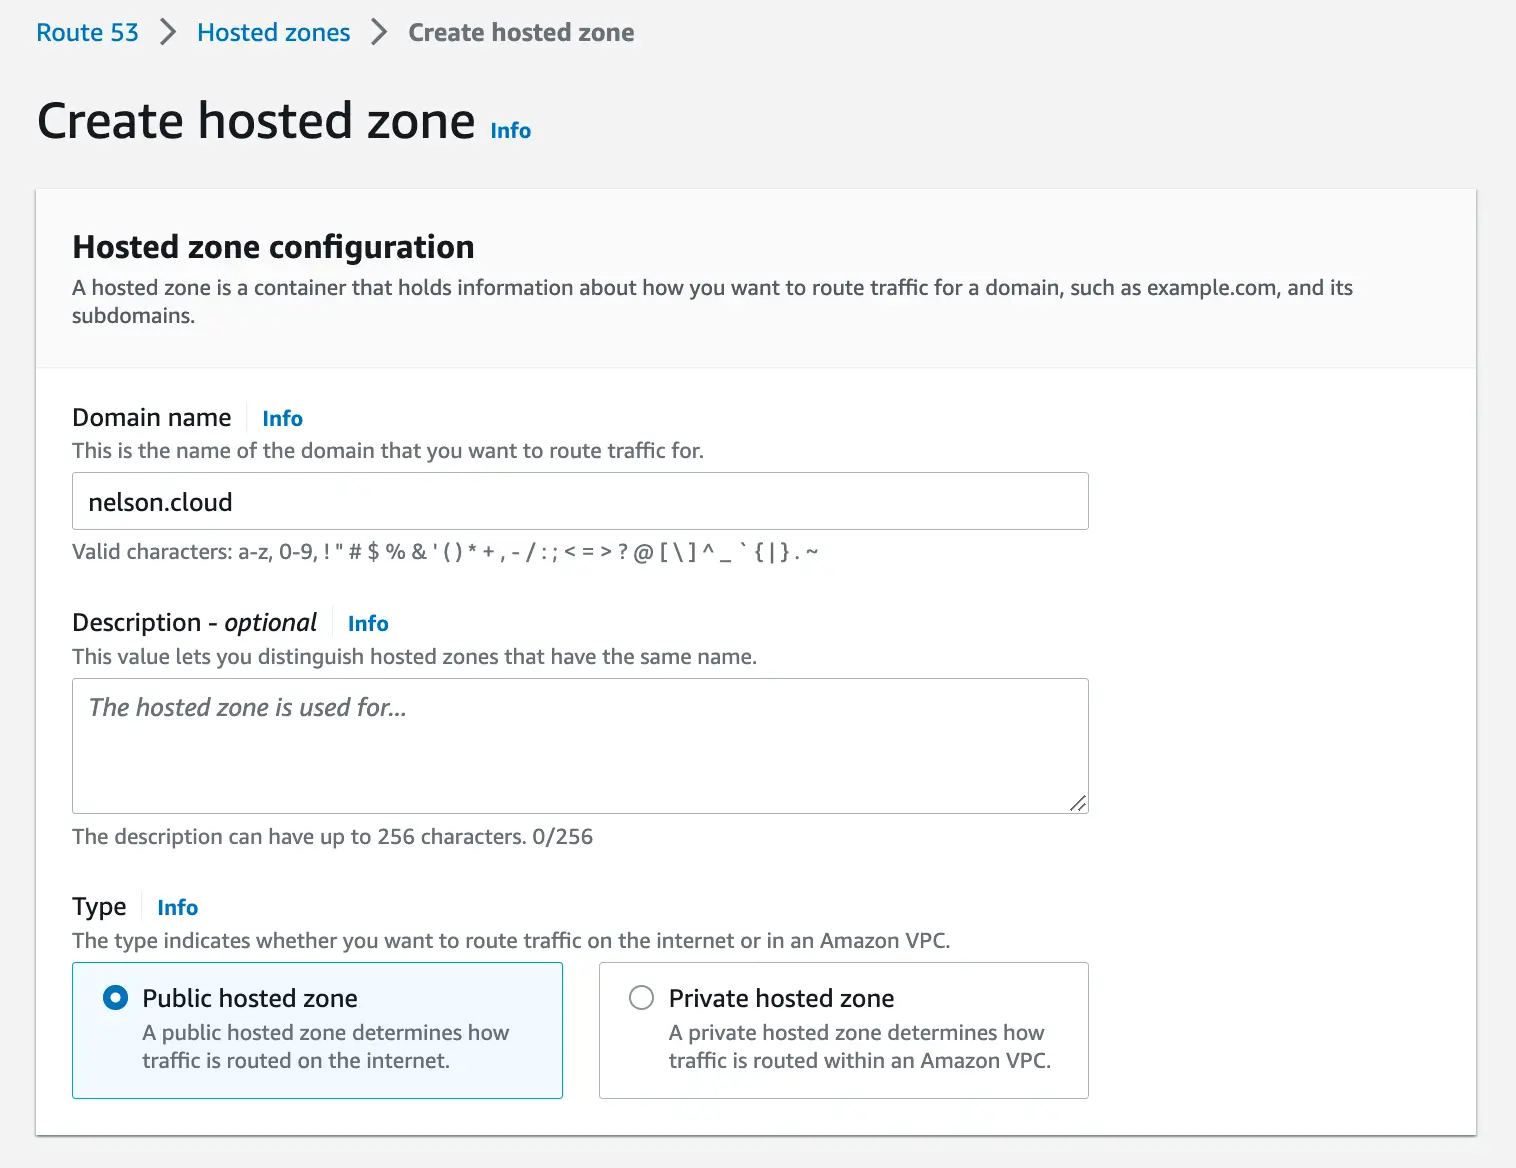
Once the zone is created, go back to your certificate and click on the upper right button that says “Create records in Route 53”. AWS will add the records for you without any manual work on your part.
After the record(s) are created, wait some time until the certificate is validated. In my case, it took around 10 minutes.
This page from the AWS documentation elaborates more on DNS validation for ACM SSL Certificates:
Creating a CloudFront Distribution
Next, we need to create a CloudFront distribution. The distribution will use the bucket and ACM certificate we created in order to host our site.
CloudFront is Amazon’s content delivery network (CDN). By deploying our site on CloudFront, our site will be available worldwide with low latency.
First, we’ll need the S3 bucket website endpoint that we clicked on earlier.
Go to the S3 bucket you created. Then, under the “Properties” tab, scroll all the way down and copy the value of “Bucket website endpoint”
Then go to the CloudFront service in the AWS console. Click the “Create distribution” button on the top right.
Under “Origin domain” paste the value of “Bucket website endpoint” that you copied. The value should be something like http://mybucket.s3-website-us-east-1.amazonaws.com

Under “Viewer protocol policy” I like to select “Redirect HTTP to HTTPS”, essentially disallowing HTTP connections.

Under “Alternate domain name (CNAME)”, add in your domain.

Under “Custom SSL certificate” select the ACM certificate that you created earlier. It should show up in the drop-down menu.

Under “default root object” write in index.html or whatever you want your root to be. This is the page that gets loaded by default when hitting your domain without a path (https://nelson.cloud/ in this case).

The rest of the settings can stay as is. Click the “Create distribution” button. Allow some time for the distribution to deploy. Once the “Last modified” field doesn’t say “Deploying” and displays a date, it’s done.

I chose to use the S3 website endpoint as the Origin, but you can also use the S3 bucket itself. I chose the website endpoint because my site has multiple index.html templates
which can give errors in CloudFront.
More on Origins in the AWS documentation:
Adding a 404 Page to the CloudFront Distribution (Optional)
CloudFront Distributions have barebones and unstylized error pages like this 404 page:

If we want to use our own custom error pages, we need to create a custom error response.
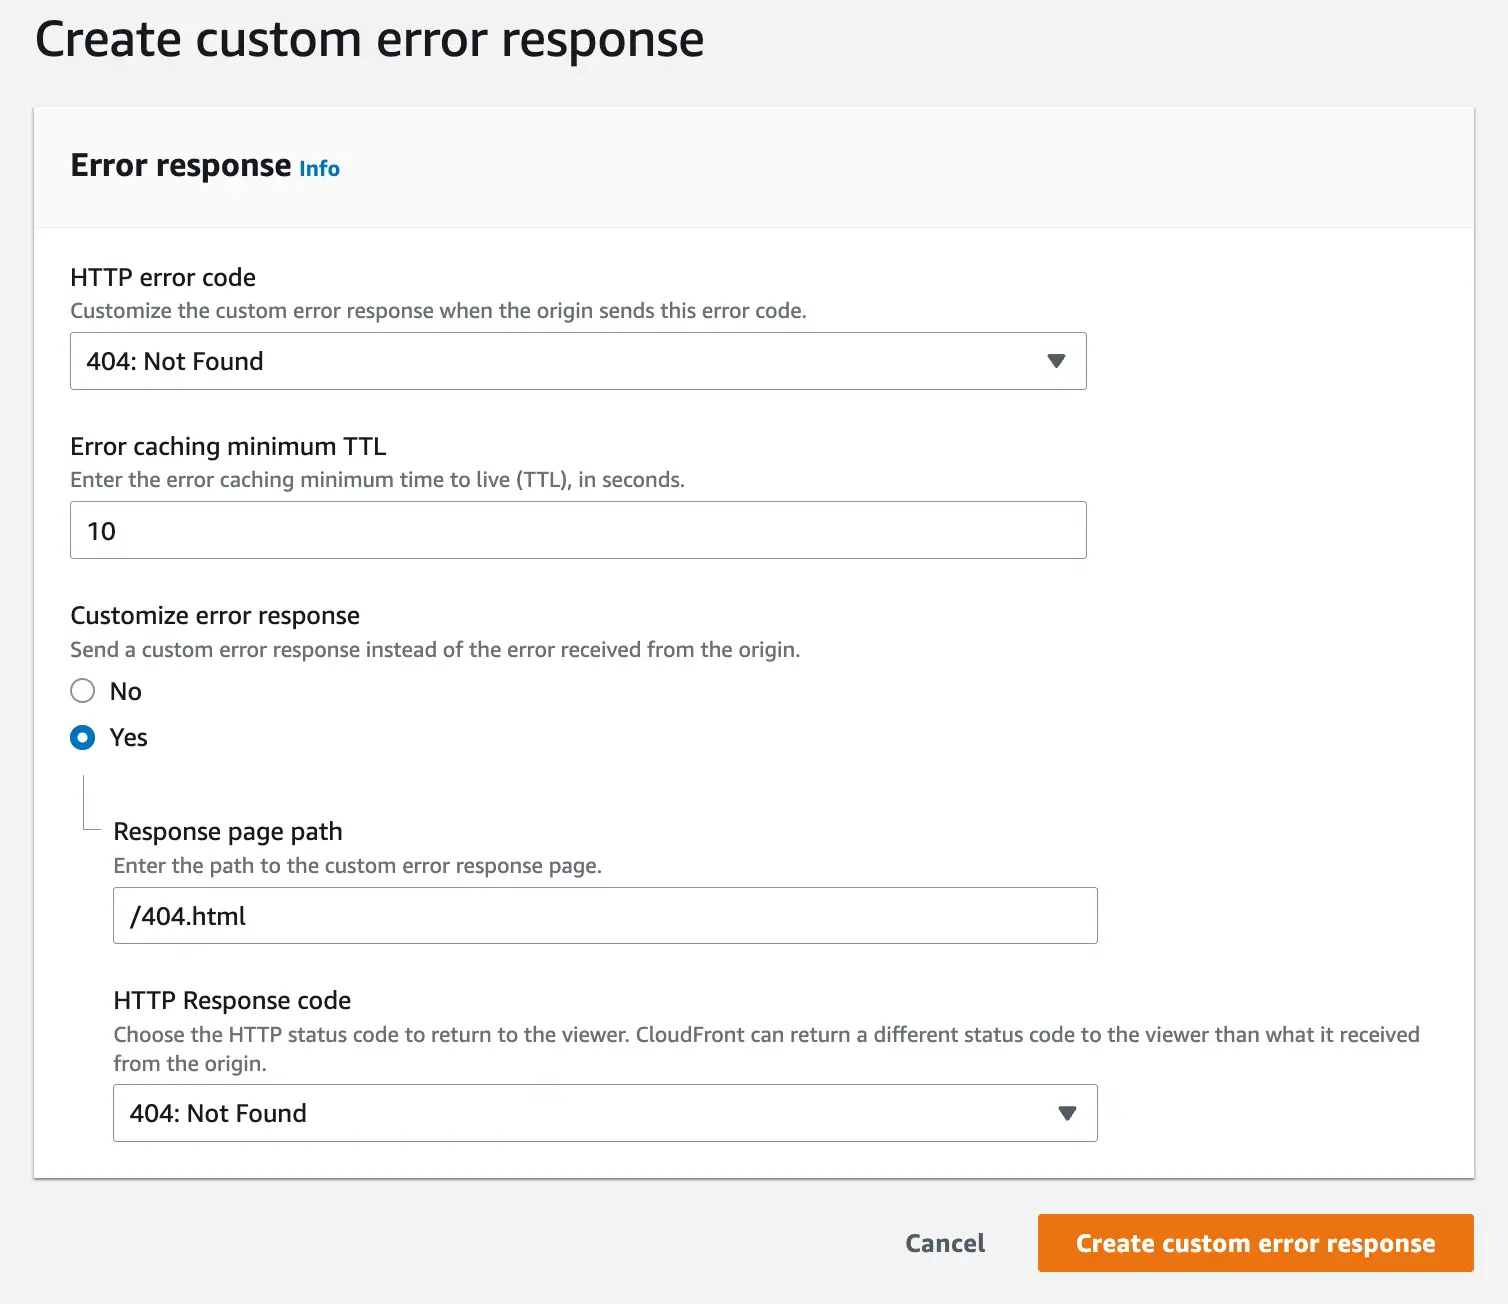
Click into your newly created CloudFront Distribution. Click on the “Error pages” tab and then click the “Create custom error response” button.
Select the following settings:
- “HTTP error code” should be “404: Not Found”
- Error caching minimum TTL can stay as is (10)
- Select “Yes” for “Customize error response”
- The “Response page path” should be “/404.html” (or whatever you want your 404 page file name to be).
- You’ll need to create a
404.htmltemplate and place it in your S3 Bucket.
- You’ll need to create a
- Select “404: Not Found” for the “HTTP Response code” field
- Click the “Create custom error response” button
Give your distribution a few minutes to update and you’re done here.
There are several other error codes you can account for using the same process. I only added a 404 page since it’s one of the most common.
Pointing a Custom Domain to the CloudFront Distribution
The last step is to point your domain to the CloudFront distribution. For this step, I once again used Route 53, but you can also create a CNAME or ALIAS record in your domain’s registrar and get the same results.
Go to Route 53 again. Click on the Hosted Zone you created earlier. Create a record with the following settings:
- Leave the subdomain blank, unless you want your site to be accessible under a subdomain like
blog.mysite.com. - For Record type, select “A - Routes traffic to an IPv4 address and some AWS resources.”
- Click the “Alias” toggle to enable it.
- Under “Route traffic to” select “Alias to CloudFront distribution”
- Under the “Choose distribution” field select the distribution you created.
- The routing policy can stay as is.
Then click the “Create records” button.

It will take some time for these changes to propagate across DNS servers. In my experience, it’s never been more than around 15 minutes. Usually faster.
Viewing The Live Site
After adding the DNS record and waiting some time, you should be able to go to your domain on a browser and see your site.

You can also test out your custom error page(s). In my case, I browsed to https://nelson.cloud/test to see my custom 404 page:
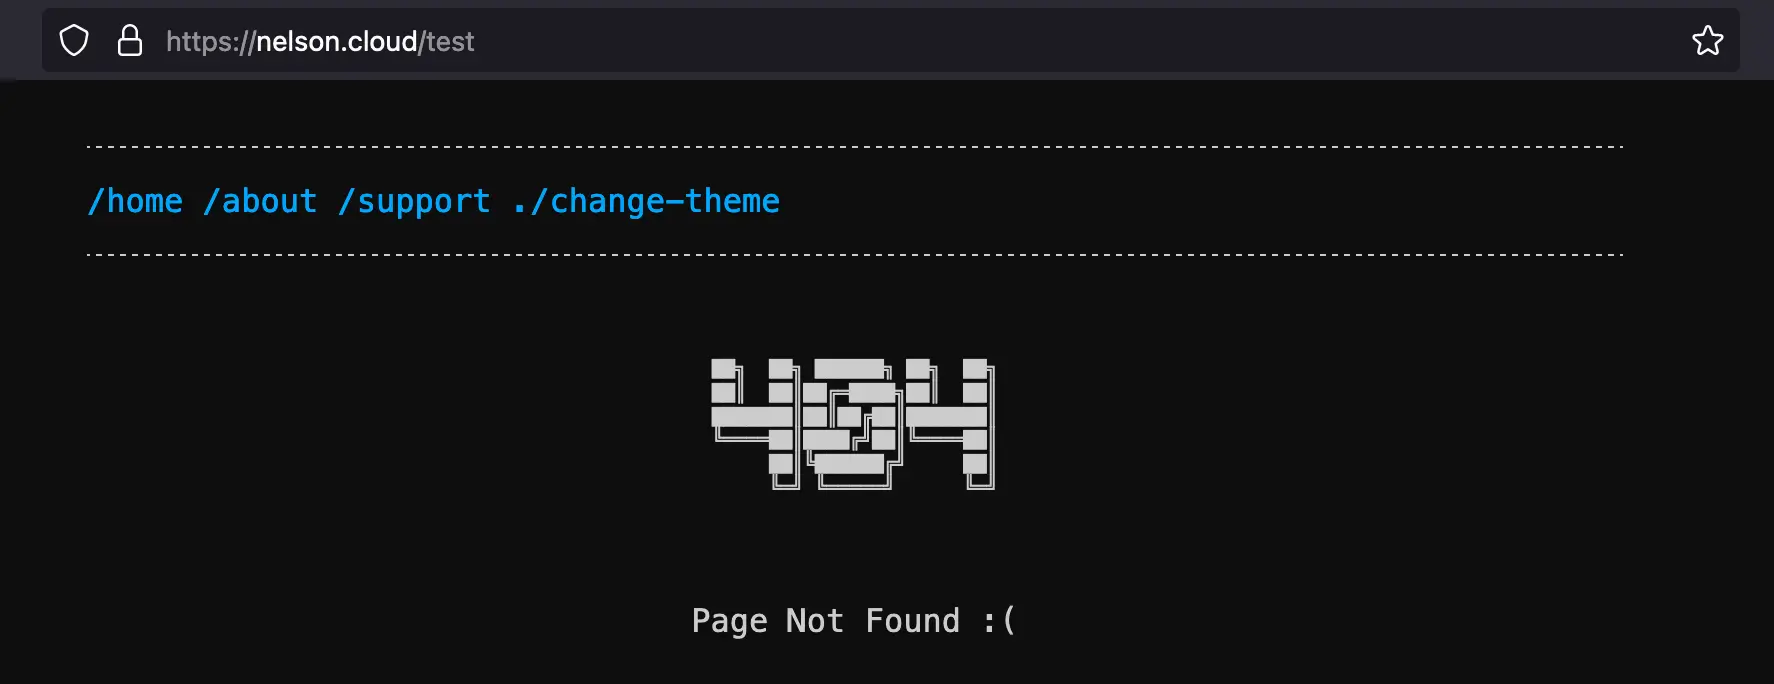
Congrats! Your site is now live.